fbpx

製作對齊的無縫隙圖框

使用精準的座標位置、大小數值,能製作出各式整齊準確的圖框。

❶ 選擇A加入新圖框,點選tool將X與Y欄位輸入「0」tool(X與Y以左上角紅框算起),將右邊及下方拉大至紅框即可大概知道實際頁面大小,典藏21x21內頁大小為204mm x 204mm,如1頁要放置16個方圖框將204 ÷ 4 = 51mm,表示圖框大小51x51。

Explain


❷ 為了避免誤差可將大小設為51.5mm,讓圖框重疊0.5mm。完成後選擇圖框按滑鼠右鍵「複製」圖框,按滑鼠右鍵「貼上」並將X欄位輸入51、Y欄位輸入0,第二次「貼上」動作將X欄位輸入102、Y欄位輸入0,再次「貼上」將X欄位輸入153、Y欄位輸入0,完成上方4個圖框。

Explain

Explain


❸ 按住鍵盤Shift鍵點選4個圖框,放開Shift鍵於圖框中按滑鼠右鍵「群組」圖框。然後「複製」圖框,按滑鼠右鍵「貼上」並將X欄位輸入0、Y欄位輸入51,第二次「貼上」動作將X欄位輸入0、Y欄位輸入102,再次「貼上」將X欄位輸入0、Y欄位輸入153,完成全部圖框。

Explain

Explain


❹ 按住鍵盤Shift鍵點選4個圖框,放開Shift鍵於圖框中按滑鼠右鍵「取消群組」圖框。將壓在紅線上圖框,一個一個點選藍點往外拉至藍線位置,避免裁切漏出白邊。(可先將頁面放大後製作)

Explain

Explain


❺ 完成後可儲存下來方便下次使用,選擇頁面樣式並選「儲存左頁為頁面樣式」,可自行輸入名稱及類別方便管理。
(左右頁因裝訂邊不同,所以左頁樣式只適用左頁)

Explain

Explain


❻ 完成整齊無縫隙的16方格圖框。

Explain


Align Page Center+Corner+Drop Shadow

Easy to drop shadow and make corner box in Inspector panel

❶ Click tool to add picture box and fill in a image and drag blue point to adjust size of picture box. Right click the picture box and select 【Align】--【Align Vertical Page Center】 then select 【Align】--【Align Horizental Page Center】 in order to align page center.

Explain


❷ Select the picture box and clicktoolat right side or application window to adjust Corner, Border Size, Border Color, Offset, Opacity and Blur.

Explain


Create your own Page Styles

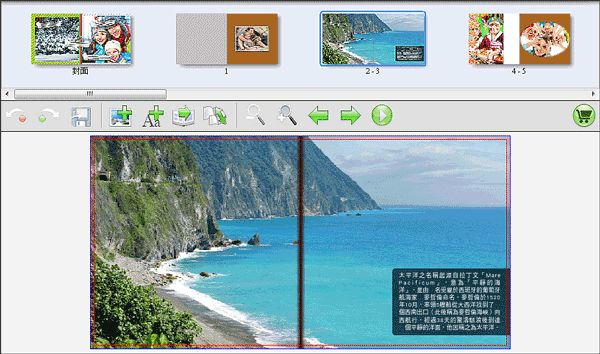
Photobook Designer is easy and flexible application, you could add image objects such as masks, scrapbooks and frames.

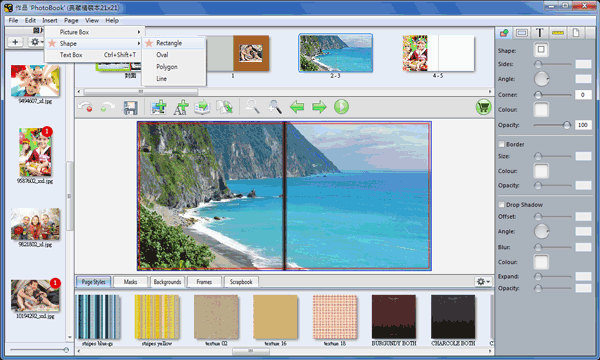
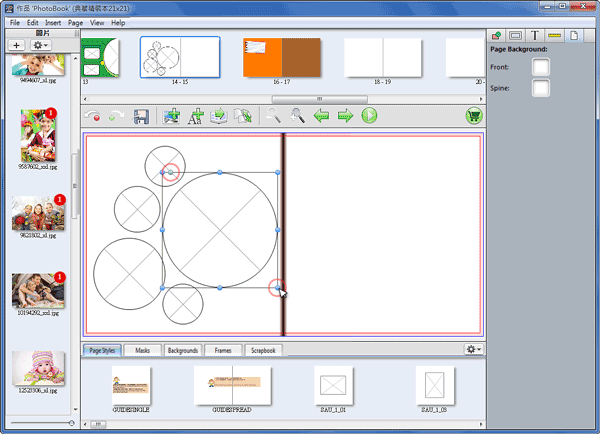
  Select【Insert】【Shape】【Oval】 to add a oval shape in current page.
      ※【Image Box】is used for placing an image,【Shape】 is used for placing a piece of color with specific shape.

Explain

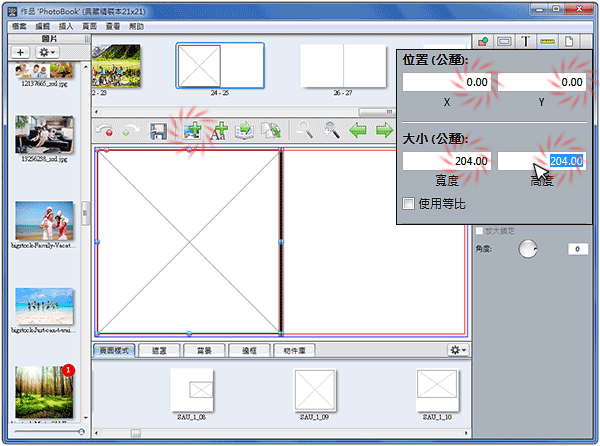
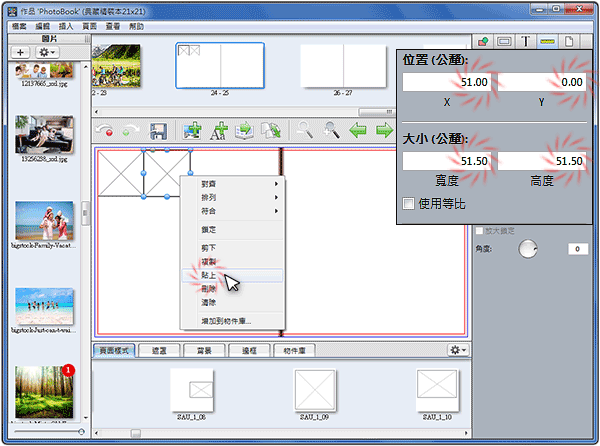
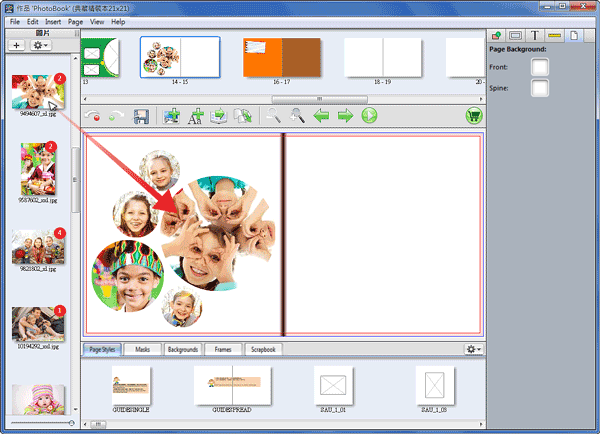
  Drag blue point to adjust size of picture box as well as drag green point to rotate it. Press Ctrl+C to copy the object and Ctrl+V to paste it in order to duplicate objects easily.
Explain


  Drag image into a picture box.
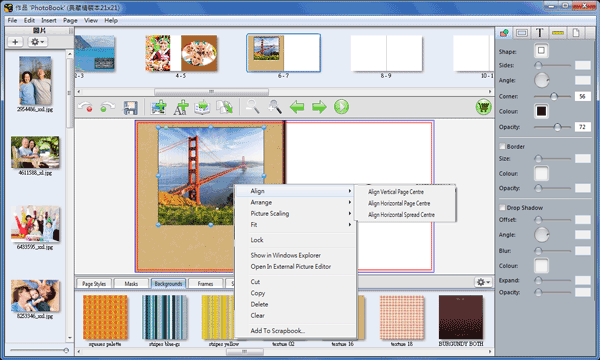
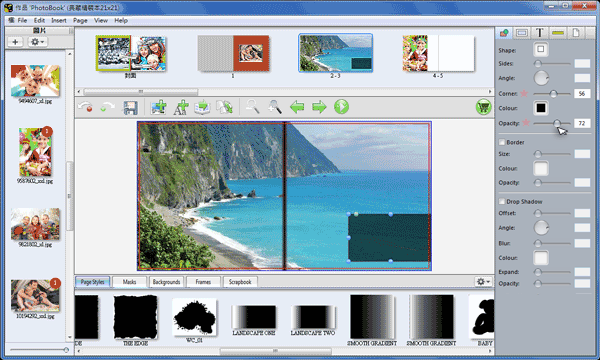
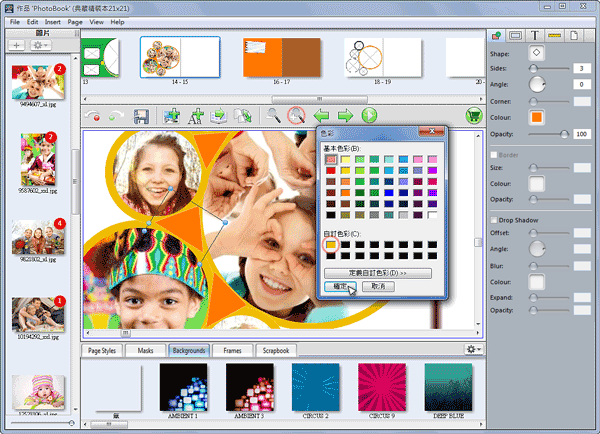
Explain

  Select the picture box and then clicktoolat right side of application window. Ticking Border and choose size of border and color.Explain

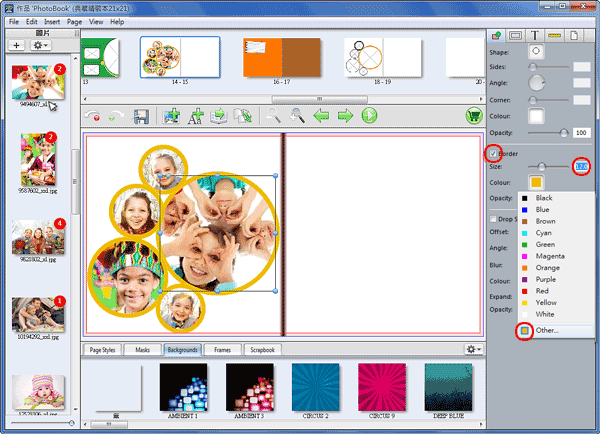
  Press 【others】 to adjust your own color and click 【Add to Custom Colors】 to save it.Explain


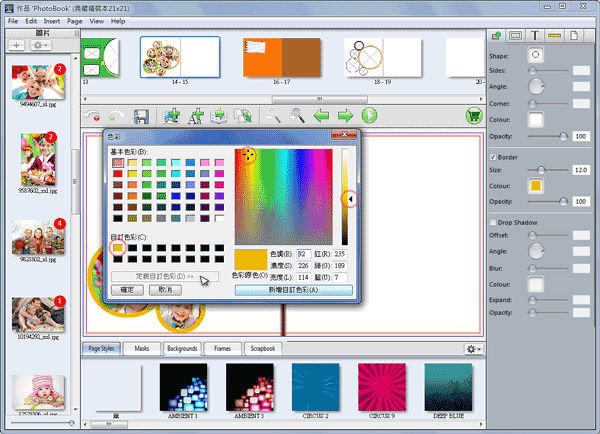
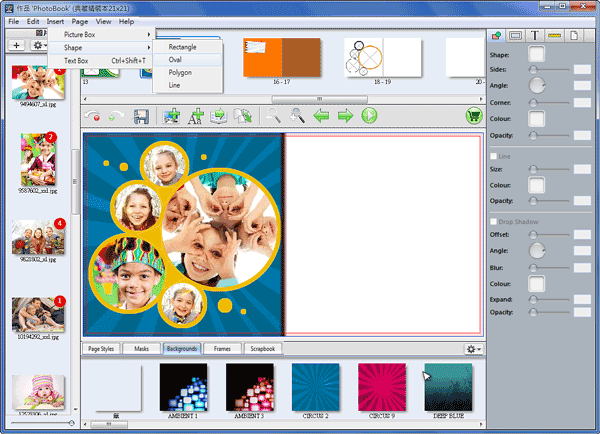
    Select 【Insert】【Shape】【Polygon】 add a shape box and enter "3" in Sides at right side of application window.

Explain

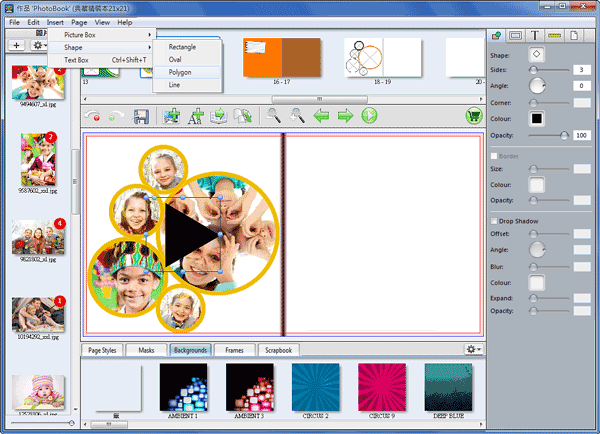
   Drag blue point to adjust size of shape box and fill in color. Click Zoom in to enlarge current page.
Explain


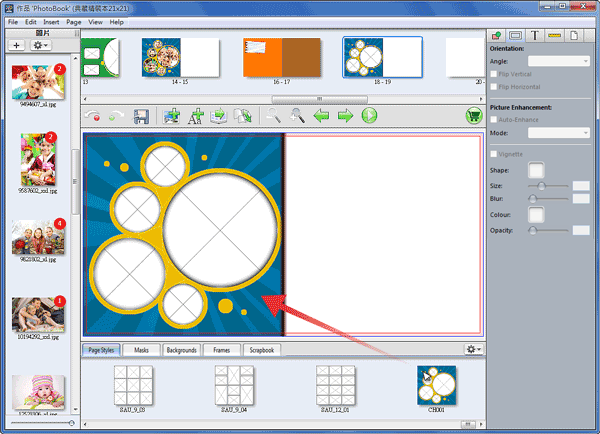
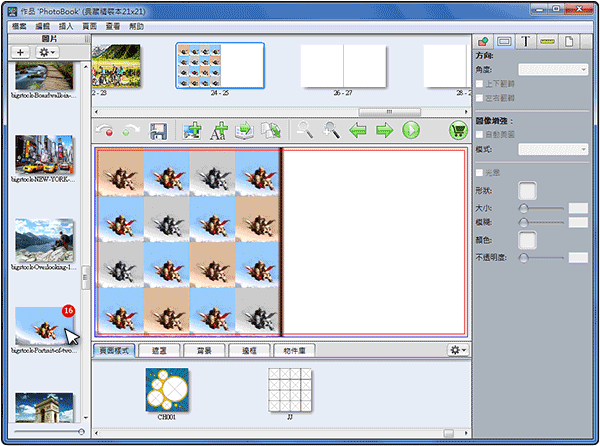
    Add a background from Library at bottom of application window and add several shape boxes by selecting 【Insert】【Shape】【Oval】.
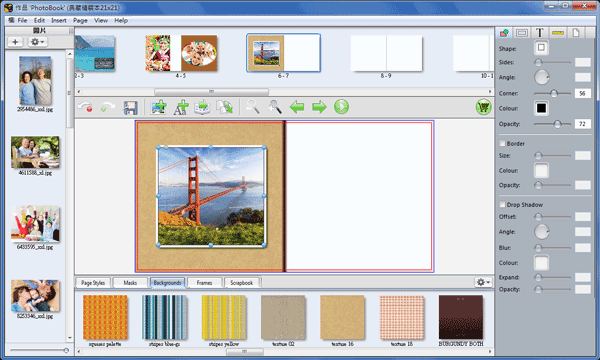
Explain

  Choose the picture box and clicktoolat right side of application. Ticking Vignette and setup shape, size, blur, color and opacity.
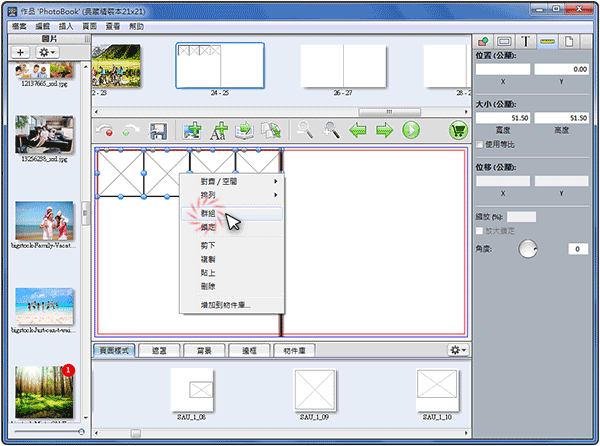
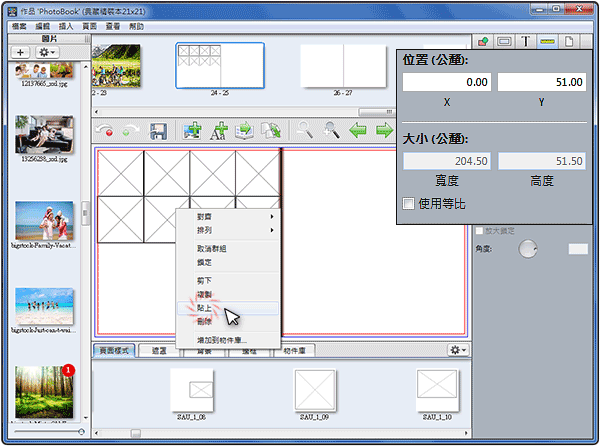
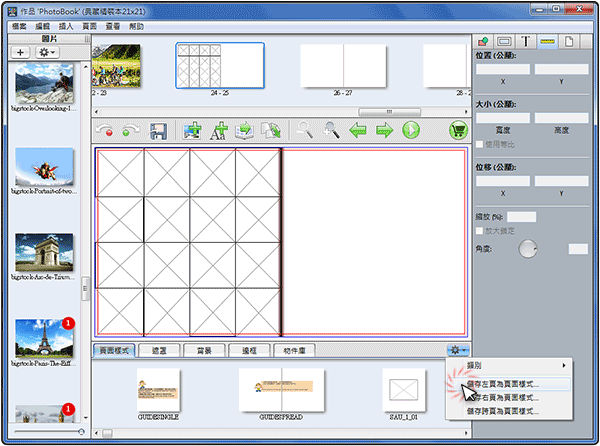
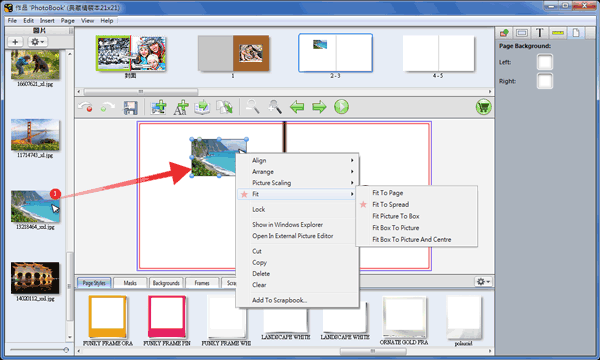
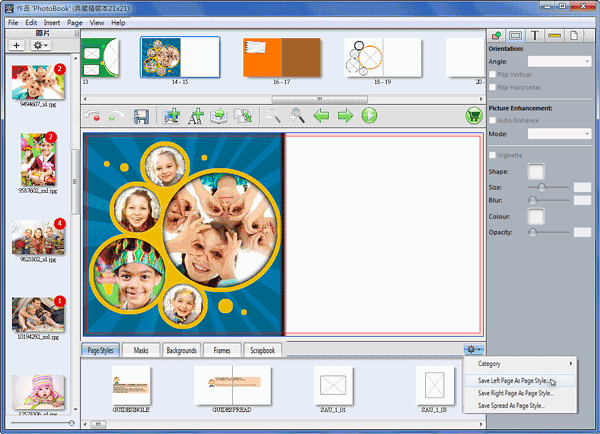
Explain


   Once it is finished, click tool and select tool to choose Save Left Page As Page Styles. (If you create it at right page then choose Save Right Page as Page Styles)

Explain

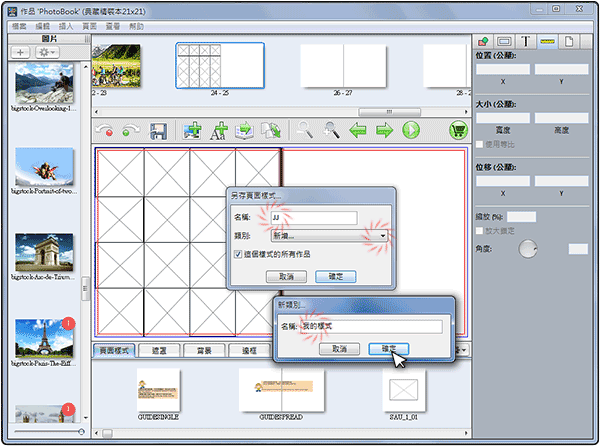
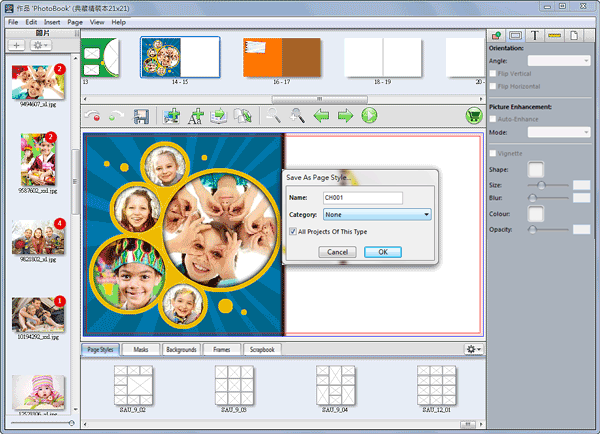
  Enter name and choose category, then ticking All Projects Of This Type.

Explain


  Open a blank page and drag and drop this page style from Library at bottom of application.

Explain


Background Spread Page with Text Illustration

Make your favorite picture as background spread pages with text illustration.

❶ Drag and drop a picture to current page. Right click this picture and select 【Fit】--【Fit To Spread】.
(If it appears an exclamation mark, replace to another picture with bigger size in order to get best printing results.)

Explain


❷ Select 【Insert】--【Shape】--【Rectangle】 to add a rectangle box.

Explain


❸ Place the rectangle box to proper position with specific size. Clicktoolin Inspector panel at right side of application window to adjust Color, Corner and Opacity.

Explain


❹ Click A to add an text box. Double click the text box and enter text content.
(You also could paste text content from a text document)

Explain


❺ Select all text characters in text box (Ctrl+A) and clicktoolin Inspector panel at right side of application window to choose Font Type, Size, Color, Opacity and Spacing.

Explain


❻ Finished.

Explain